Surfaces as a Guide
Highlights
MiningMath allows you to guide optimization by adjusting only the Z-values of its generated topography surfaces, preserving alignment and format. This approach simplifies the creation of force or restrict mining constraints and facilitates integration with external tools. Providing flexibility in the final period (using <end>) enables the model to optimize period counts. This method enhances control over deeper mining areas while maintaining consistency with MiningMath’s geometric logic.
The easier way to work with surfaces is by manipulating the Z coordinates of the topography generated by MiningMath, while keeping the same values for the X and Y coordinates.
The surfaces generated in MiningMath have always the same format. Each one of them has an equivalent number of lines. Moreover, the data follows the same order from the first row to the last one. Hence, you can choose the topography file and use it as a guide. This could also facilitate: 1) conversions to original coordinates from other software; 2) filter of regions and pits; 3) creation of force and restrict mining files; and many other options using this concept.
It is worth mentioning that this approach could be easily done by using a simple worksheet and loading the CSV files generated in the viewer for further analysis.
If you are considering geometries, mainly the Mining Width with surfaces imported from a different software package, there will be conflicts between the geometric criteria of MiningMath and the geometric criteria from the surfaces imported.
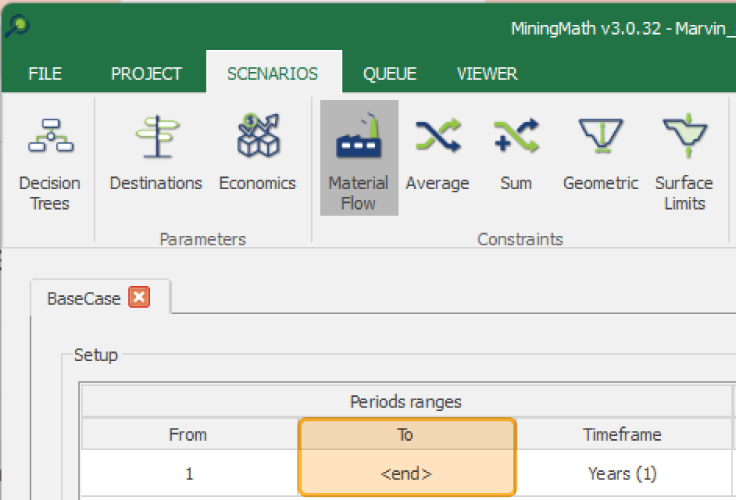
You must give some freedom for the last period so that MiningMath can also optimize the number of periods. It means that you should use <end> instead of using a lock period range, such as from 16 to 16 for instance.
In order to add more material from deeper areas, you can use a base surface to increase its depth where you wish to get closer to what the project requires. Focusing on the main areas in early periods, you provide tips to the algorithm so that it can understand your approach by using surfaces. The following steps will reproduce an efficient workflow to promote this optimization:
Download this excel file to use as a guidance advance in the steps.
Insert the data in the yellow cells based on your block model information.
Paste the coordinates of the topography surface
Define a new column, plan Z, to represent the coordinates Z of a surface plan. If you are not sure what is the plan Z, you can import a test surface on the viewer, and identify the elevation in which you want to force the bottom area below it.
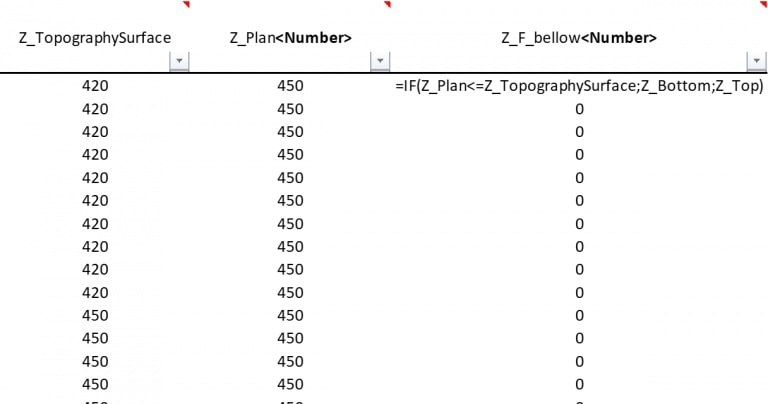
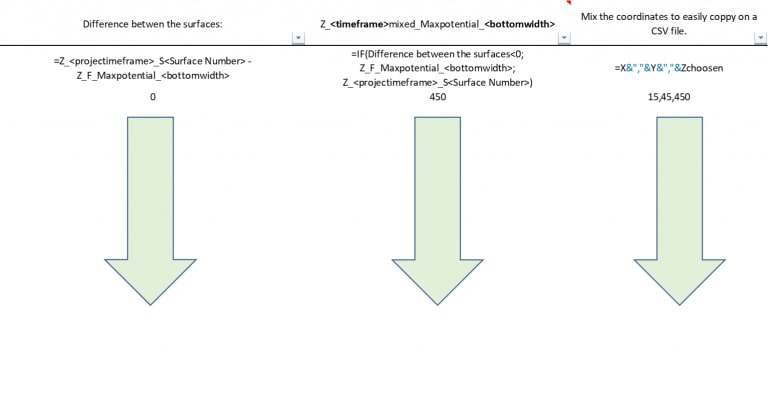
Create a new column to represent the coordinates Z of the restrict mining surface. This will be used to identify the maximum amount of ore, respecting the geotechnical aspects, that could be extracted. Finally, you can create a condition to define the restrict mining Z at the bottom Z if it is below the plan Z, or at the topography Z otherwise. The figure below depicts this concept and respective formula in Excel.
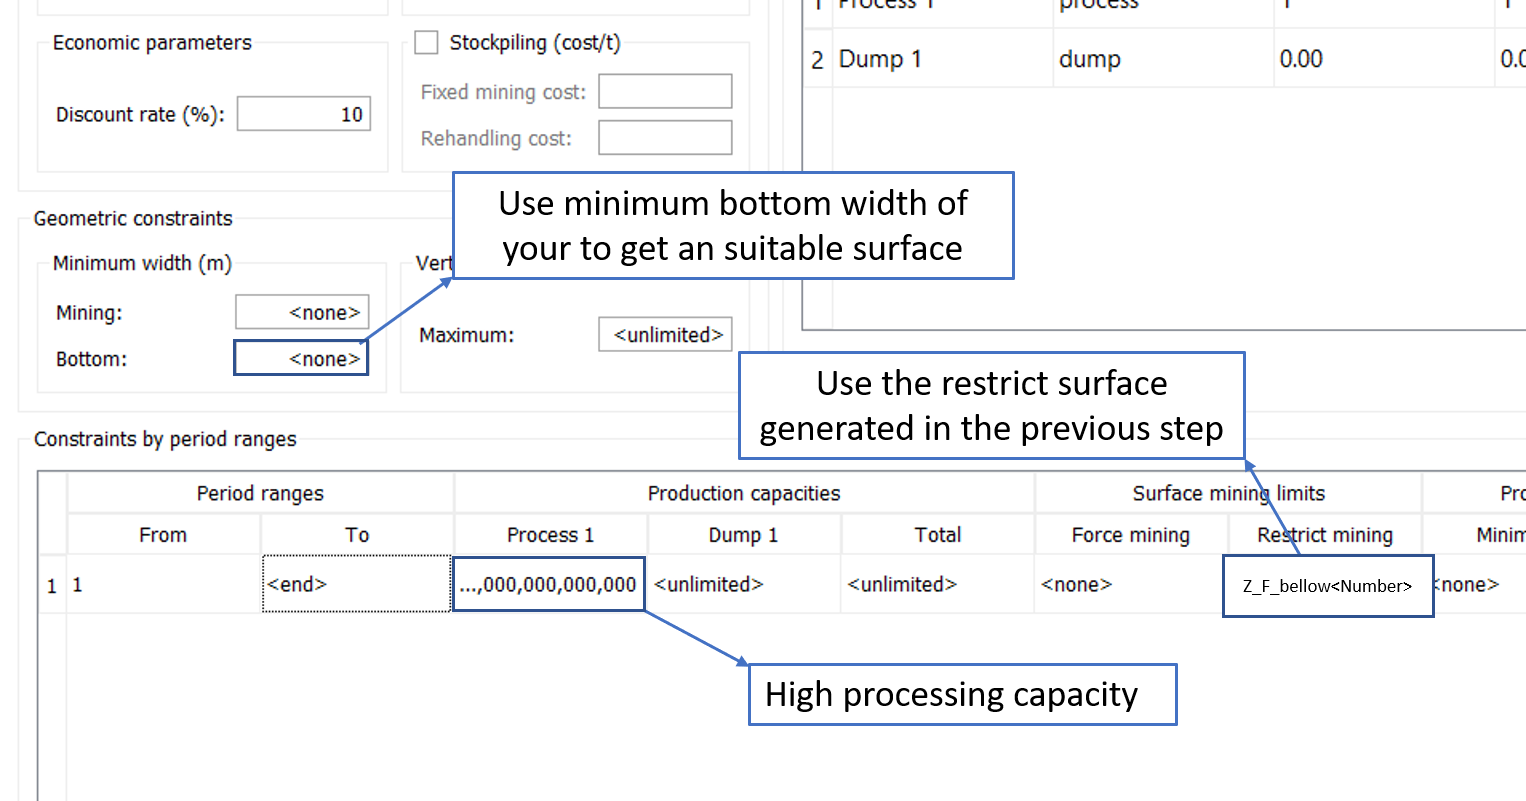
Set up your scenario and run.
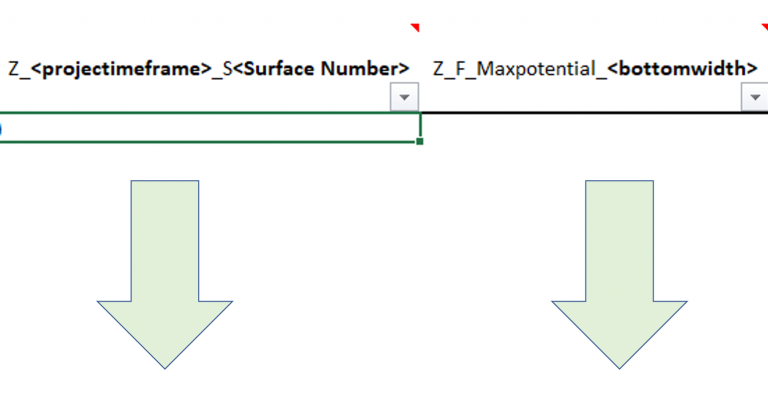
Place the Z coordinate from the base surface that you what to increase the depth to extract more material in the bottom
Paste the coordinate from the maximum potential scenario
Calculate the difference between them.
If the area of the maximum potential surface is bellow the surface base, it will consider the lowest elevation. Therefore, it will consider the additional ore that can be extracted in the bottom along with the base surface used.
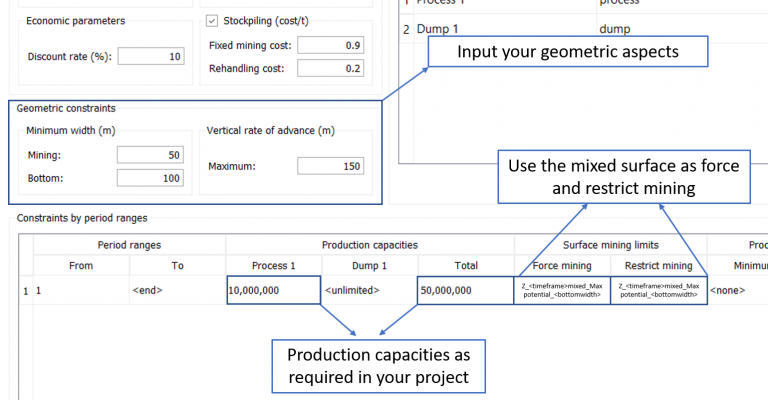
Use the mixed surface as force and restrict mining at the period range that you want to achieve it.
Note: After this step, MiningMath will generate operational surfaces so that you can use it on your projects considering the timeframes required.


