Home Page
Highlights
The Home Page centralizes access to your most recent projects and core optimization tools, streamlining your workflow from startup to execution.
- Quickly resume recent projects or create new scenarios directly from the start screen, minimizing setup time and manual navigation.
- Navigate decision trees and manage scenarios in one place, enabling fast edits, comparisons, and restructuring of planning strategies—an exclusive feature of MiningMath’s integrated interface.
- The Model Table and Calculator provide immediate access to block model data, supporting transparent, on-the-fly validation without leaving the interface.
MiningMath automatically opens on the home page, as shown below.
Recent projects and main menu
Two main areas are acessible from the home page:
Recent projects:This section allows you to select a project. Right-clicking on the project name provides you with a range of options:

New scenario: The "Scenario Config" window will open, allowing you to choose which decision tree to place your new scenario in. You can also enter a name and a description for it. After that, you'll be directed to the Scenario tab to set it up
Here's a more user-friendly version:
Show in Explorer: This option opens the directory containing the folder with your project files and data.
Remove from list: This option removes the selected project from the Recent Projects list
Delete project: This option permanently deletes the project and all associated scenarios.
MiningMath menu: this provides quick access to essential functions.
Here's a description of each item:
New Project: Use this option to start a fresh project. Clicking on it will allow you to create and configure a new mining optimization scenario from scratch.
Open Project: This allows you to open an existing project that you have previously worked on. You can browse your files and select the project you want to continue.
License: Clicking on this option takes you to the licensing section, where you can manage your software license, check its status, or enter a new license key. More info about license can be seen here.
Help: This displays a new window with key software information and links to other essential resources.
Close: This option closes the current session or the entire application.
Decision Trees and Model areas
Once a project is selected, the Decision Trees and Model areas will be displayed (as depicted below).
Both sections provide key information about project results and block model parameters. They can be used as follows:
Decision Trees: This feature allows you to quickly navigate through recent scenarios without needing to open them from their original folders.
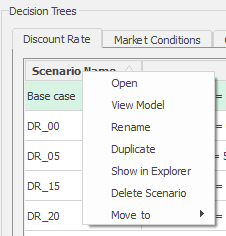
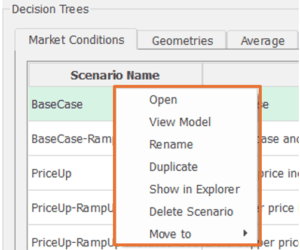
Additionally, it lets you create new tabs and organize your mining planning strategies by exchanging scenarios as needed. You can access all paths involved in the project, giving you a comprehensive view that enhances your decision-making process (read more). To open any scenario, right-click and select the "Open" option.
 Alternatively, you can select the scenario and click “Open” at the bottom right of the screen. The “View” button next to it will take you to the Viewer tab instead.This area also displays scenarios for each tree (example below).It provides key information such as name, description, NPV (M$), runtime, and a direct link to the sheet containing all the results of the scenarios (available after execution).Lastly, several options are available to manage Decision Trees:
1) Add new trees by clicking on “+”

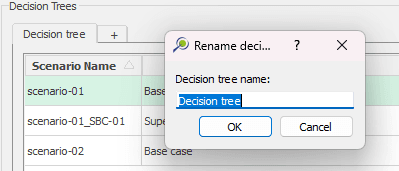
2) Rename a tree by double-clicking its name
3) By right-clicking on the tree name, you can add a new scenario, rename the tree, or delete it.
For more options, right-clicking on a scenario’s name reveals hidden choices: open, view model, rename, show in Explorer, delete, and transfer it between decision trees.
Finally, the scenario description can be easily edited with a double click.
Model Table: This section provides key information about your block model and its parameters, allowing you to easily review it at any time using the "Edit" button. This will take you to the Calculator functionality.


